Logz.io reports allow you to automatically send dashboards on a regular schedule over Slack and email.
Configuring a report
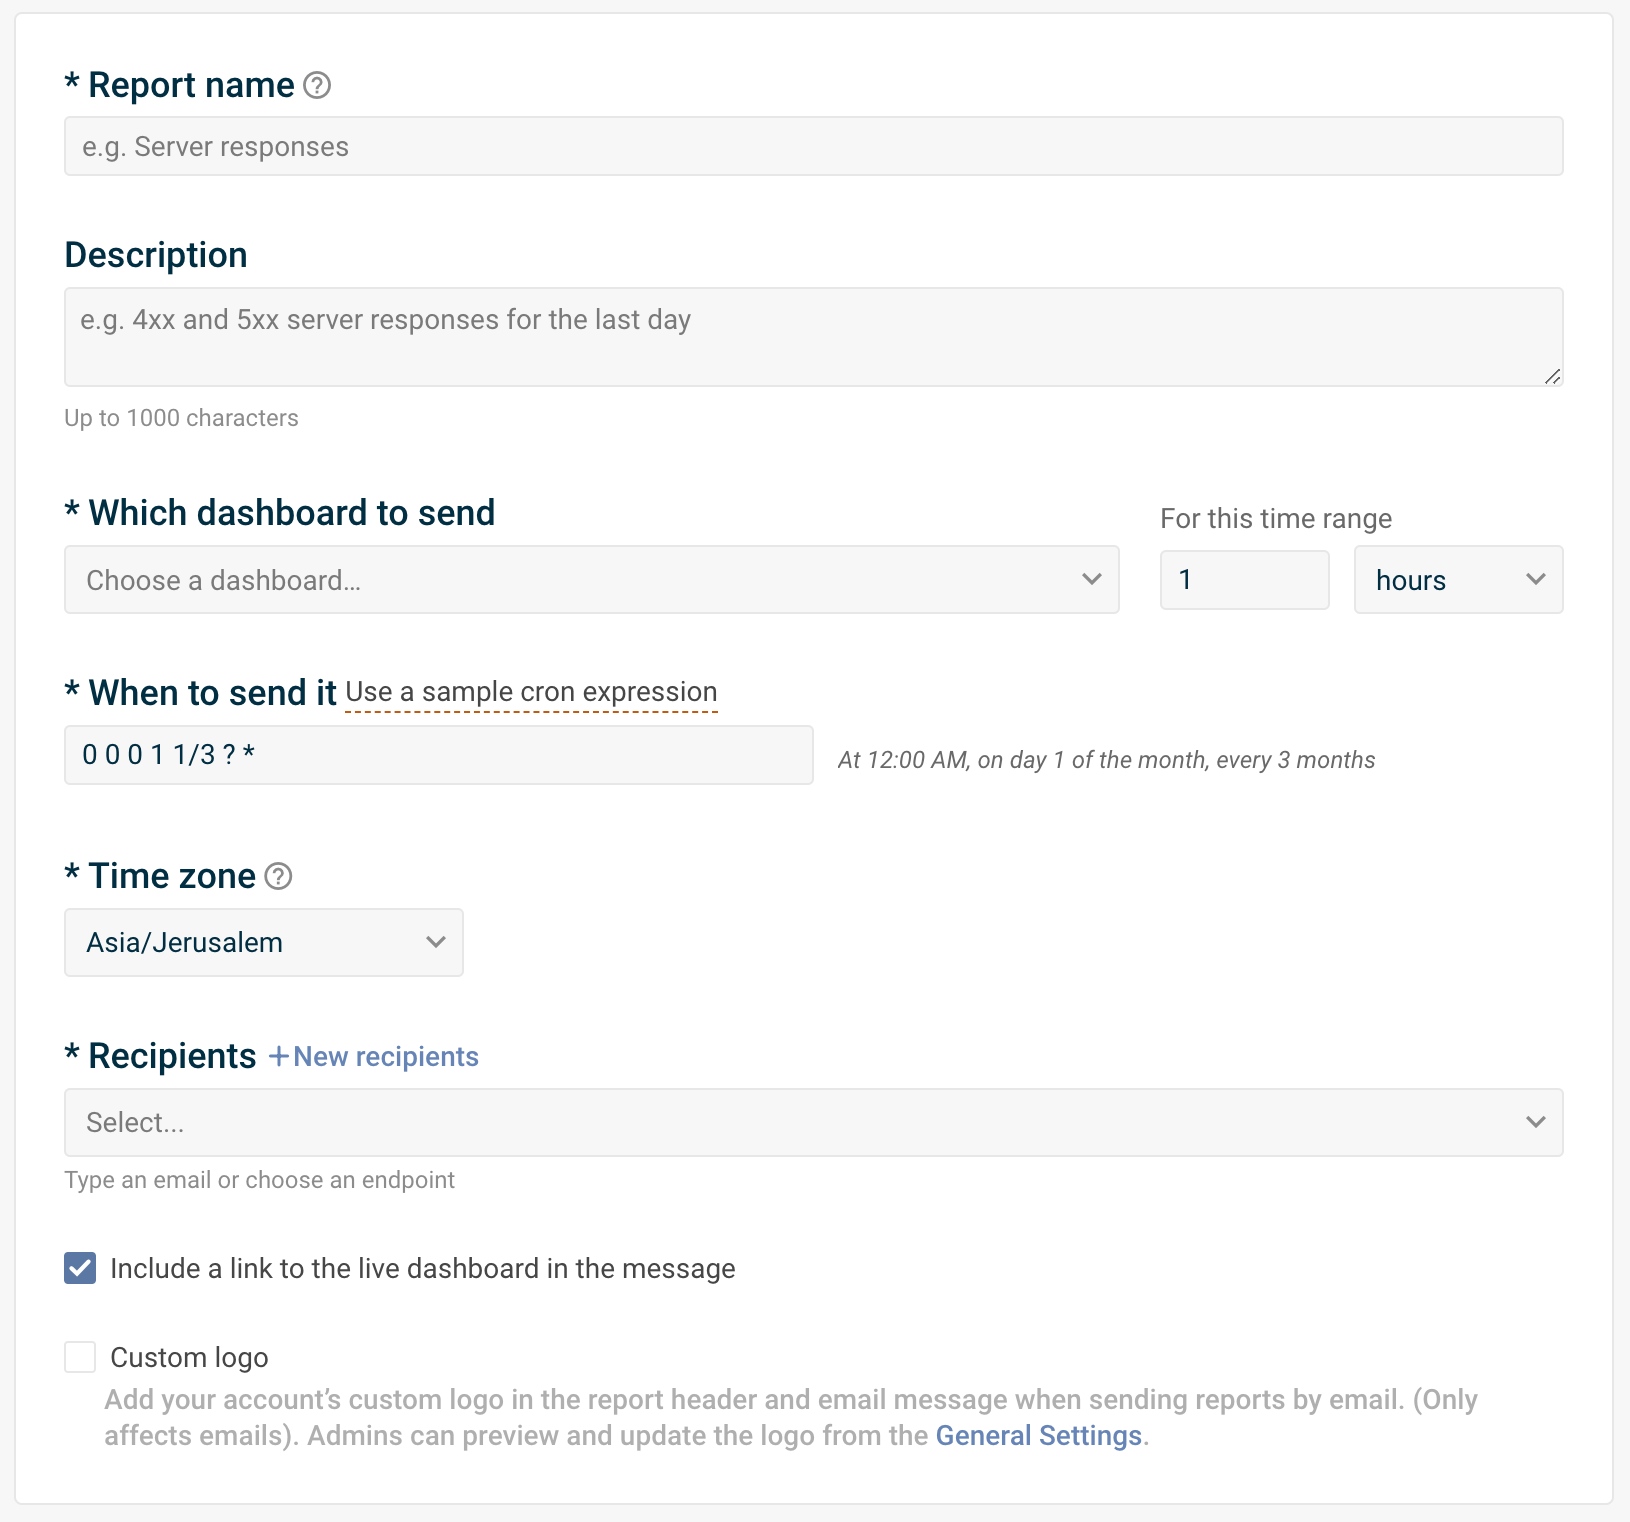
Give your report a name and description
Your report’s name will be shown as the email subject or Slack heading.
The description will be included in the message body. It’s a good idea to use the description to give some context for why recipients are receiving the report.
Select a dashboard and time range
In the form, under Which dashboard to send, select a dashboard from the list.
Next, select the time range for the dashboard. Under For this time range, select the time frame in minutes/hours/days. Your time range can be anything from 1 minute to 30 days.
Set the schedule
Use the Cron scheduler to set the schedule for your reports to be sent automatically.
You can use an online tool such as the Quartz Cron Expression Generator to easily translate your requirements to a cron expression. The scheduler can be used to set up advanced schedules, like the last day of every month, or the last Thursday of the month at a specific hour.
Select your recipients
Use Who to send it to to choose the report’s email and Slack recipients.
Custom logo & sharing link

You will find more options at the bottom of the form:
- Custom logo
- You can enable the option to include your account’s Custom logo in the report.
When the report is sent over email, the custom logo will be included in the email body and PDF header. Admins can upload and update a custom logo from the General Settings page.
- View in OpenSearch Dashboards link
- You can enable the option to Include a link to the live dashboard in the message.
If enabled, the report will include a direct link to the dashboard in Logz.io. Your recipients will need to log in to Logz.io to see it.
Here’s an example of what the report email might look like.

Schedule your report:
-
Open a dashboard, and click Create report from the dashboard menu.

-
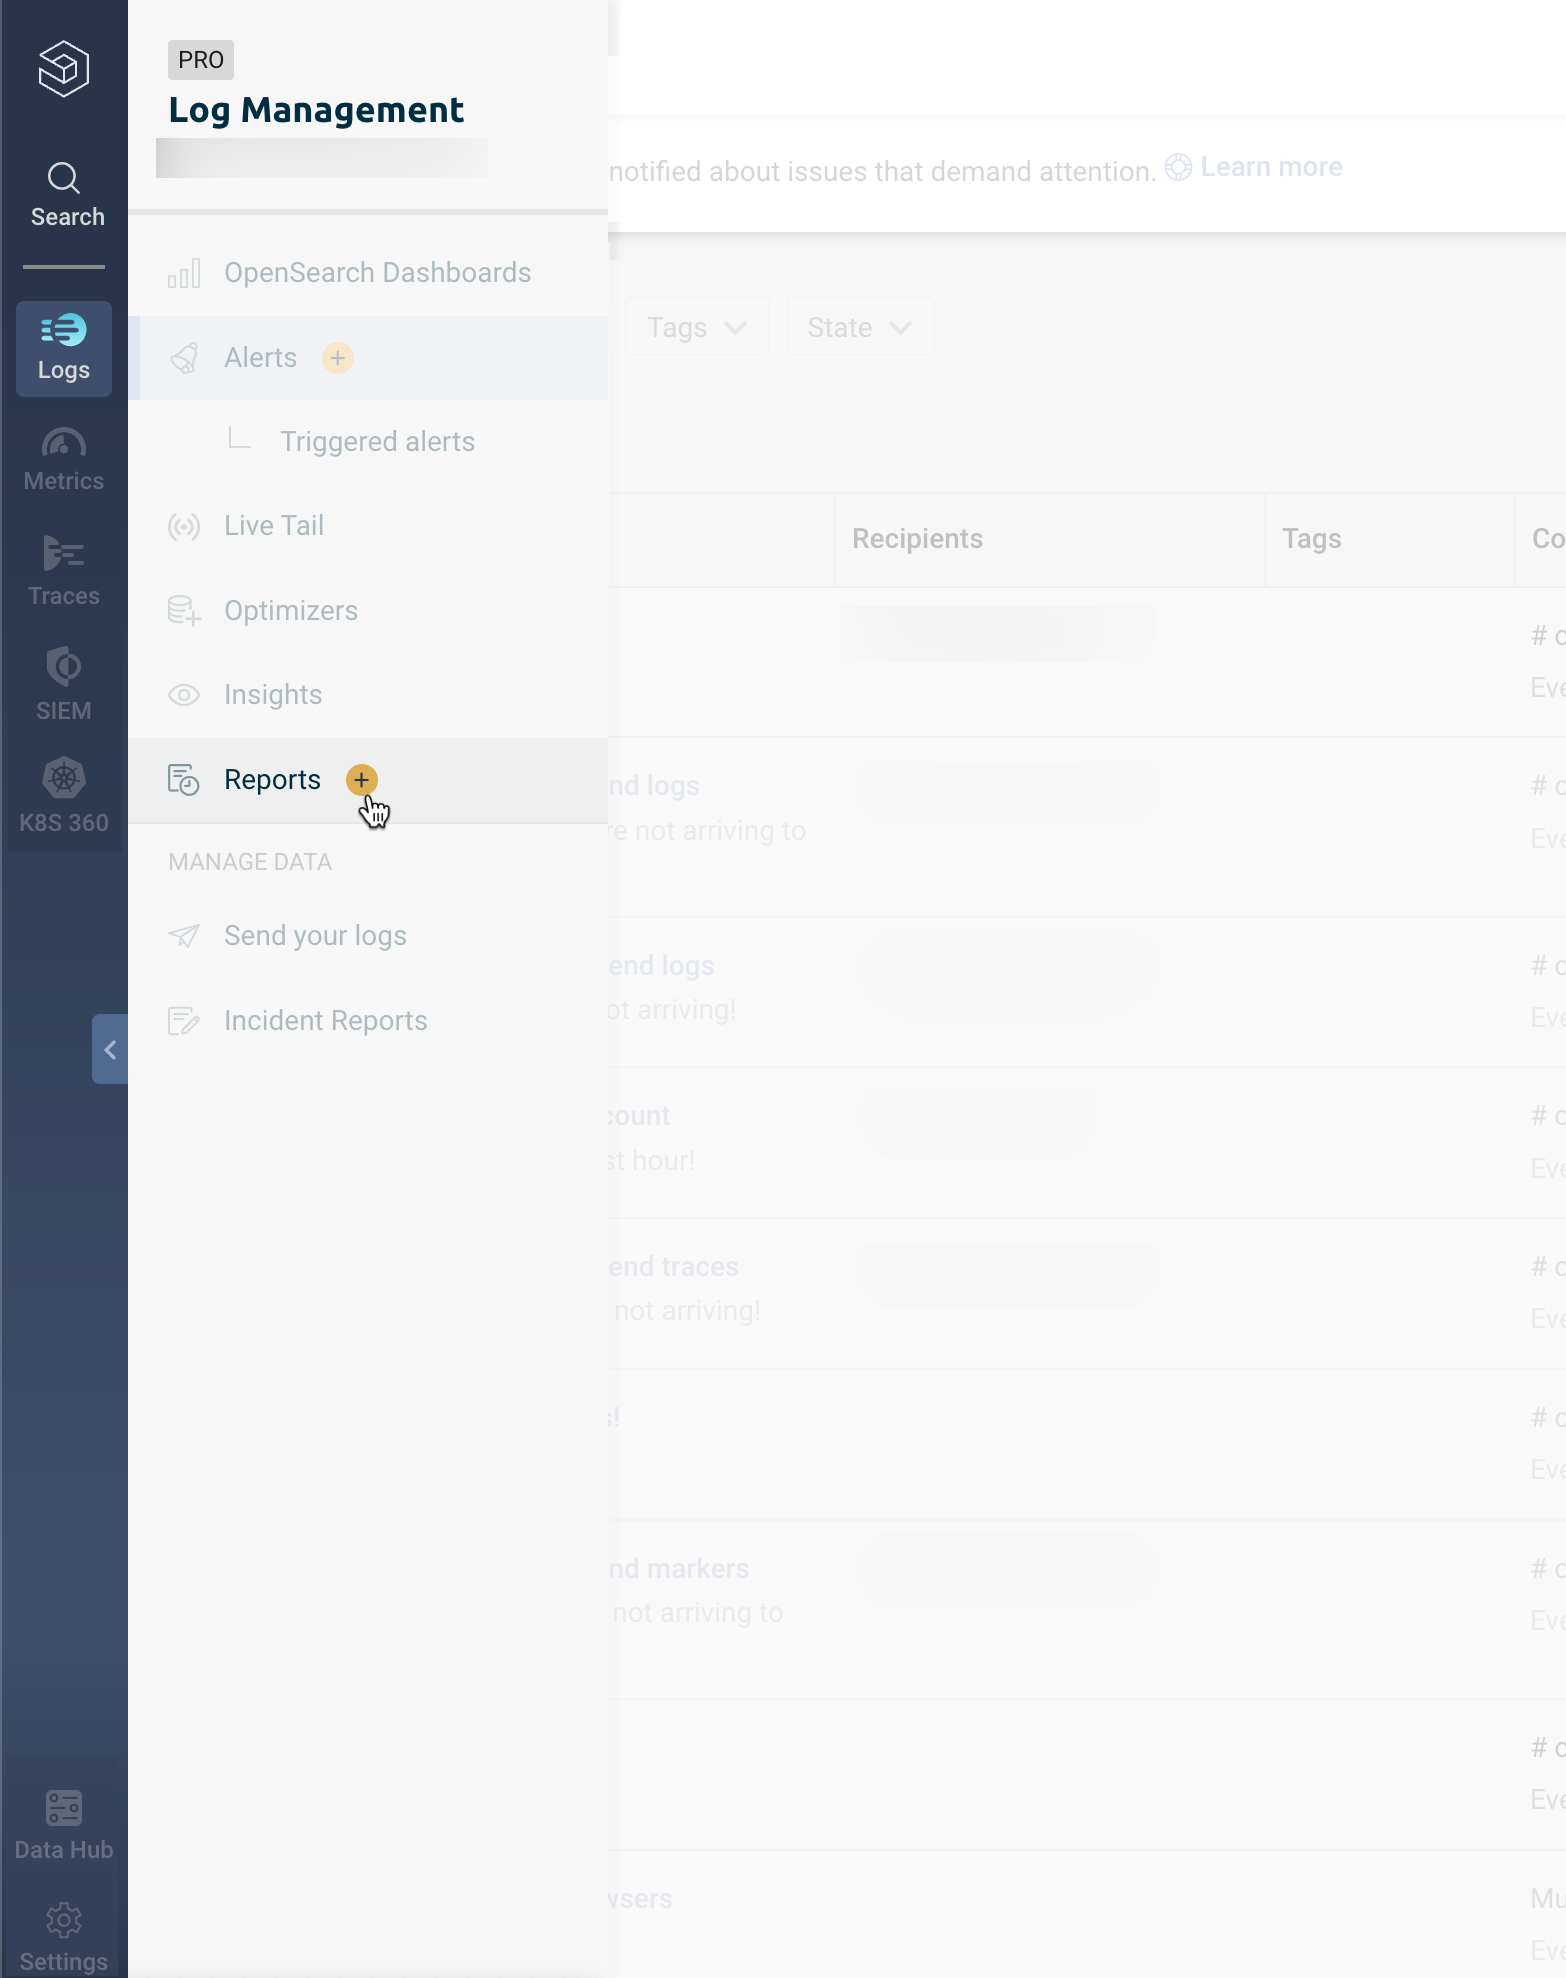
From Logs > Reports in the navigation menu, click the yellow icon to open the Create a report page.
